Download Quickstart Package
What is Quickstart?
Quickstart package is a full website package that includes: templates, extensions, database, images and once you install the quickstart successfully, you will have a complete website that is exactly the same as our Demo. The advantage of using quickstart is you can run your website in minutes. All you need to do is to extract the quickstart to our package in your WebHost.
Most of our quickstart package includes pro extensions which you can save a lot of money in building a website. Here is the list of our quickstart package for your choices click here
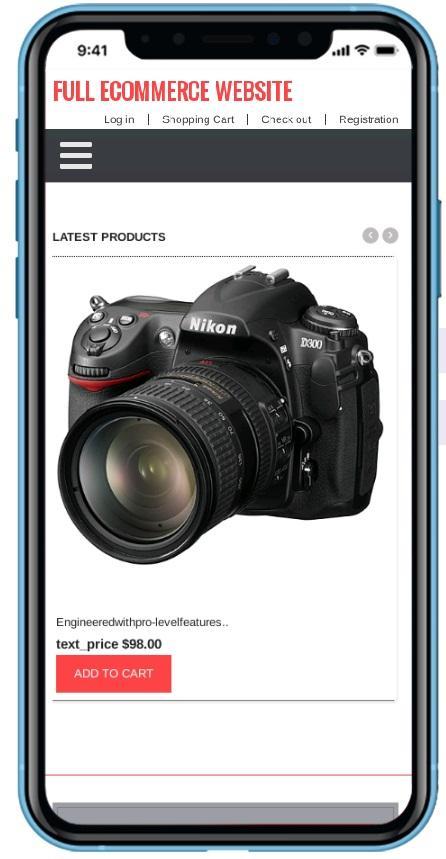
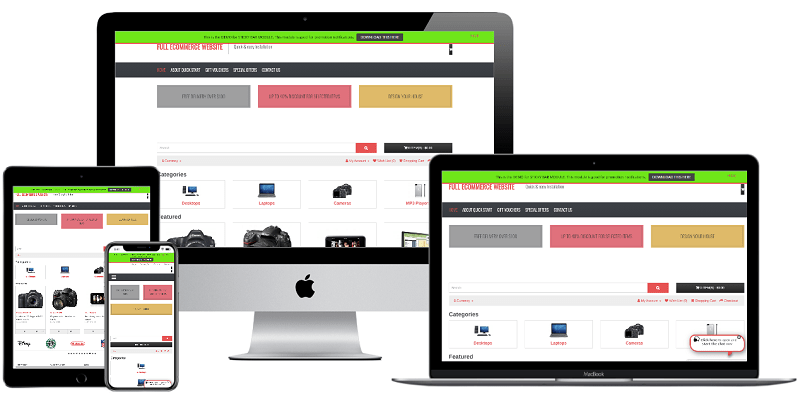
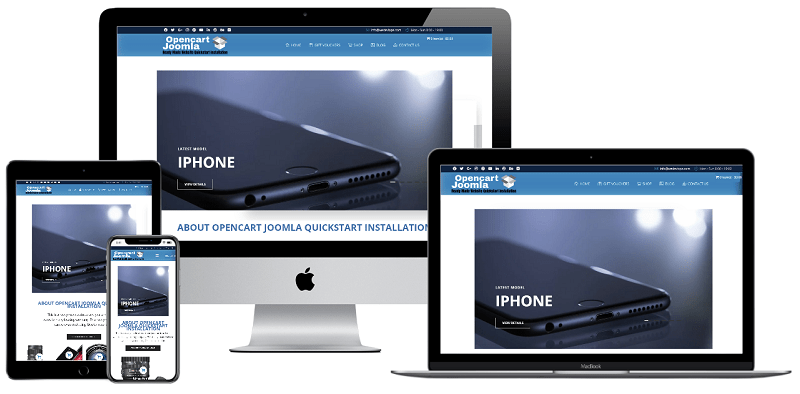
Click the image for the live preview:
Below are your guide in using the quickstart Joomla package
1. Extract and Upload
Once you have the Quickstart package, extract the downloaded package. If you want to install the quickstart from your hosting, please upload all folders in the folder that you just extracted to the FTP Base folder (normally it is public_html). Or you can upload the zip file and simply extract it to the public_html directory.
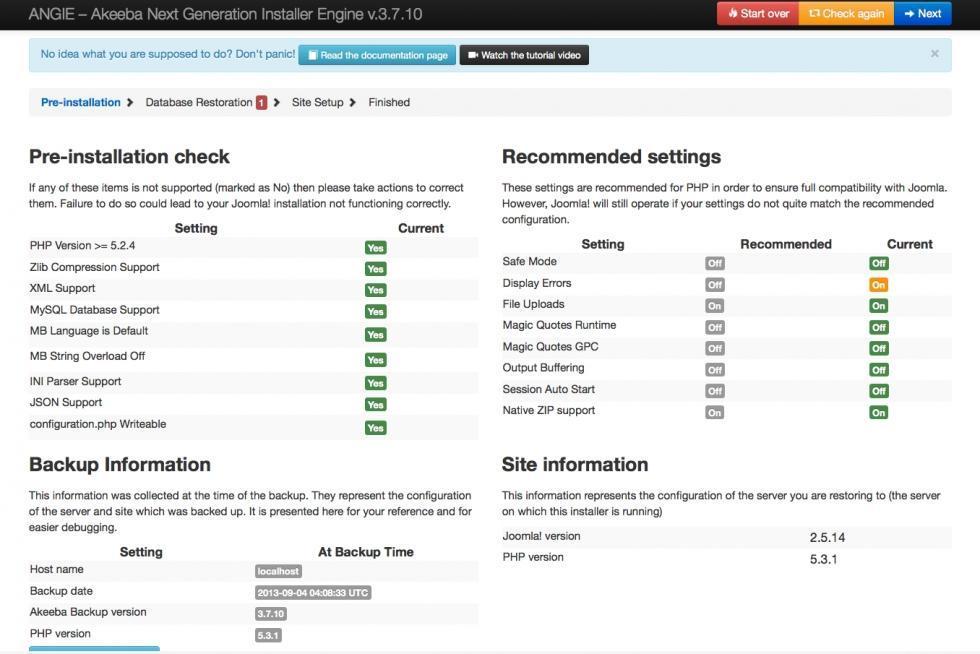
2. Create Database
Access your database control panel to create a new database. Make sure all the rights are check on the database user.
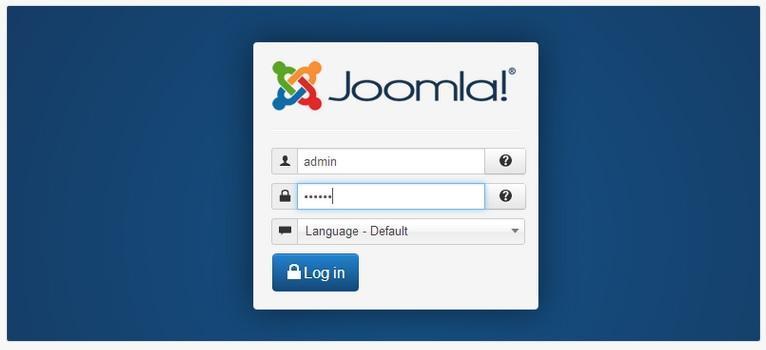
3. Install - Joomla 3 - Go to your browser and type the domain name for your website.
For example, if your domain name is www.wedevlops.com - type this to any browser. We recommend google chrome but you can use any browser you like. Once you press enter; It will load the akeeba quickstart. Just follow the option or click next.
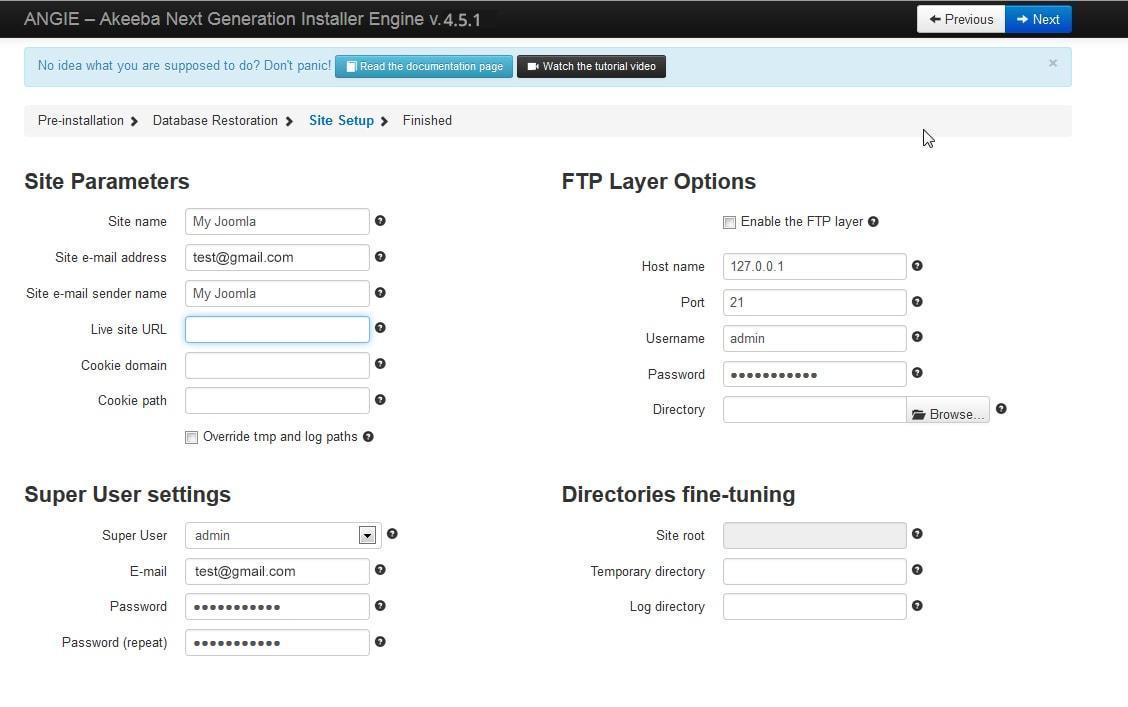
4. Configuration
5. Site Setup
Notes:
- Select Language: as Joomla supports many languages, select the language that you want your website to be. Select your language for easy management
- Site Name: enter your site name into the field.
- Admin Email: add the email of the Administrator, you configure to send the configuration detail to the email.
- Admin Username: add the username of the Admin, this is the username to log in the backend panel as Superuser so make the user remember the username.
- Admin Password: enter the password for the admin account.
- Confirm Admin Password: retype the admin password to confirm.
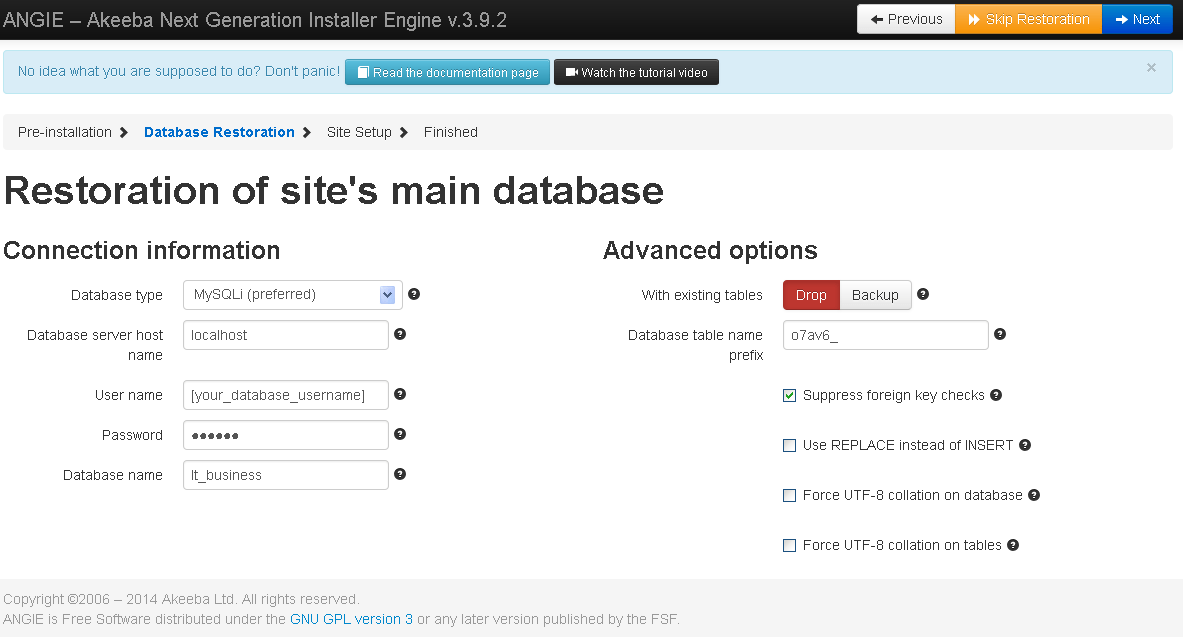
- Database type: select the database type: MySQLi or MySQL.
- Hostname: enter your hostname in this field. In this example, we install in localhost so the hostname will be "localhost" but if you install from your hosting, you have to enter your hostname.
- Username: enter the username to access your host.
- Password: enter the password goes with the entered username to access your host.
- Database Name: paste the database name that we created in Step 1.
- Table Prefix: enter the table prefix the database name.
- Old Database Process: If the database we enter here is an existing database, we can select to back up or remove the old database.
6. Deleting Installation
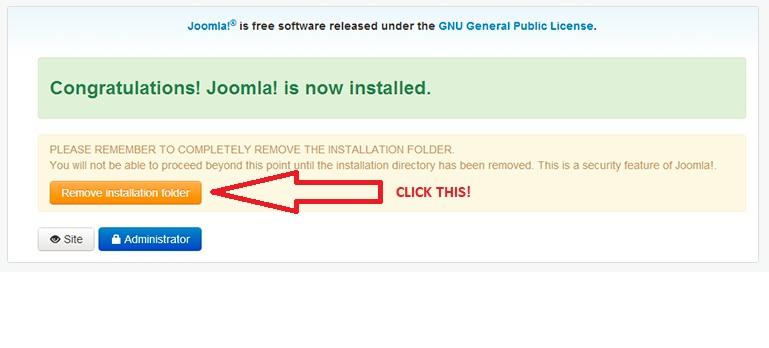
The installation is complete, now access the Admin panel with the account you entered in the installation process
7. Congratulations you finished your quickstart installation